Classic Car Body Panel Alignment: Why Gaps Tell the Story of a Restoration

A beautiful paint job cannot hide a bad gap
Stand ten feet away from a freshly restored classic car and the paint usually gets your attention first. Walk closer, however, and something else begins to determine whether the restoration truly feels right.
The door sits a little low at the rear. The hood is proud on one corner. The character line begins perfectly on the fender, disappears at the door and reappears half an inch lower on the quarter panel. The deck lid has a wide gap on the left and nearly touches the body on the right.
None of those problems may stop the car from driving. Yet once you see them, they become difficult to ignore.
Body panel alignment is one of those restoration details that looks simple after it is finished and can consume days when it is not. It is also one of the clearest signs of what happened beneath the paint. Good gaps suggest that someone understood the structure, respected the assembly sequence and spent time making the whole body work together. Poor gaps can point to worn hinges, weak body mounts, collision damage, reproduction panels, an out-of-square structure—or simply a restoration that moved into paint too quickly.
Panel alignment is not the final cosmetic step. It is the visible result of every structural and assembly decision that came before it.
What a panel gap is really telling you
A gap is the space between two adjacent body panels, but evaluating alignment requires more than measuring that space.
Gap width: Is the opening reasonably consistent from one end of the seam to the other?
Flushness: Do the surfaces sit on the same plane, or is one panel recessed or proud?
Body-line continuity: Do moldings, creases and styling lines flow cleanly across adjoining panels?
Edge relationship: Are the panel edges parallel, or do they converge and spread?
Operation: Does the panel open, close and latch without lifting, dropping, rubbing or springing?
Loaded position: Does the alignment change when weatherstripping, glass, trim or interior weight is installed?
A door can have a uniform gap and still be wrong because it sits too far inward. A hood can be flush at the front and high at the cowl. A deck lid can look centered while its leading edge rubs the body every time it opens.
The objective is not simply an equal-looking black line around every opening. The objective is a panel that fits, operates and visually belongs to the structure around it.
Factory correct is not the same as modern perfect
Before chasing perfection, decide what kind of restoration you are building.
Classic American automobiles were assembled on production lines, not in modern custom shops. Factory gaps varied. Stamped panels were not identical. Fiberglass bodies introduced their own inconsistencies. Workers adjusted doors and sheet metal within the realities of production speed and the manufacturing tolerances of the time.
That history does not excuse a door that strikes the quarter panel or a hood that sits visibly crooked. It does mean that a mathematically identical show-car gap may be more perfect than the automobile was when new.
A concours-oriented restoration may aim to reproduce accepted factory appearance. A high-level custom build may deliberately create tighter, more uniform gaps. A quality driver may preserve some honest factory variation while ensuring safe operation and a coherent appearance.
All three approaches can be valid. Trouble begins when the objective changes halfway through the bodywork.
Document everything before disassembly
The best time to begin panel alignment is before removing the first bolt.
Photograph every opening from several angles. Capture the complete side profile, then move closer to the upper and lower door gaps, hinge locations, striker, hood corners, cowl, deck lid, rocker and body lines. Place a ruler or gap gauge in selected photographs so the image records scale.
Do not assume the car’s starting alignment is correct. The documentation provides a baseline, not a verdict. It can reveal which problems already existed and which appeared during restoration.
Record shim locations and thicknesses before removing fenders, hinges or body mounts.
Mark hinge positions with a fine scribe or careful reference marks where appropriate.
Bag and label hardware by location; do not combine left and right shims.
Photograph hidden repairs, cracks, elongated holes and witness marks.
Note whether the doors contain glass, regulators, trim and latches when measurements are taken.
Create a simple gap map showing tight, wide, high and low areas.
Six months later, a photograph showing three original fender shims behind one mounting point can save hours of guessing.
Begin with the structure, not the hinge bolts
If the foundation is moving, panel adjustment becomes an endless circle.
Before aligning the exterior, verify the condition of the frame or unitized structure, body mounts, floors, rockers, cowl, pillars and attachment points. A sagging body, collapsed mount or poorly repaired collision can make the gap problem impossible to solve through normal adjustment.
Convertibles deserve particular respect because the roof is not there to help stabilize the body. Support the car correctly. Confirm that the doors behave consistently with the vehicle resting on its suspension, and understand whether lifting the chassis changes the openings.
On a body-on-frame restoration, the body must be mounted and shimmed in its intended relationship to the frame before final exterior alignment. New body mounts can alter height and twist. Tightening the mounts in a careless sequence can change openings that looked perfect a day earlier.
A striker is not a structural repair. If you must raise the rear of a sagging door by forcing it upward as it latches, the striker is carrying a load it was never intended to correct.
The door is usually the anchor
On many classic-car restorations, the door becomes the reference panel because its relationship to the quarter panel, rocker, roof or windshield pillar establishes the middle of the body.
Begin by evaluating hinge condition. A worn hinge pin or bushing creates movement that no amount of careful adjustment can permanently solve. Open the door slightly and lift gently at the rear. Noticeable vertical play points to wear that should be corrected before alignment.
With sound hinges, adjust the door to the fixed structure first. Establish height and fore-aft position relative to the quarter panel and rocker. Then establish flushness. The striker should help the latch secure the correctly positioned door; it should not drag the door into place.
Check the full sweep of operation. A gap that looks excellent when closed may pinch at the leading edge as the door opens. Protect finished edges with tape during test fitting, but remember that tape itself adds thickness in a tight area.
If the door will eventually carry glass, regulators, power-window motors, speakers or heavy trim, consider that final weight during the process. A bare door shell can change when fully assembled.
Align outward from known reference points
Once the door is correctly related to the fixed body, the adjoining bolt-on panels can be brought to it. A common sequence is to establish the door, then fit the front fender to the door, then fit the hood to the fenders and cowl. At the rear, establish the deck opening and then fit the deck lid within it.
The exact sequence varies by vehicle, and factory assembly information is invaluable. The principle is consistent: work from the least adjustable or most structurally fixed area toward the panels with greater adjustment.
If you align the fender beautifully to a misplaced door, you have not solved the problem. You have transferred it.
Gap width, flushness and body lines are separate adjustments
This distinction prevents a great deal of frustration.
Moving a door rearward may improve the front gap while damaging the rear gap. Adding or removing a shim at one fender bolt may change flushness without materially changing the gap width. Rotating a hinge can move one corner more than another.
Work methodically and change one thing at a time. After each adjustment, close the panel gently, observe the result and record what changed. Randomly loosening every fastener usually erases the useful reference you had.
First establish the panel’s overall position in the opening.
Then balance the major gaps.
Next correct flushness along the adjoining surfaces.
Confirm that character lines and moldings agree.
Finally test opening, closing, latching and clearance through the entire travel.
Sometimes an improvement in one dimension exposes a problem in another. That is normal. Alignment is an iterative process, but it should not be a random one.
Shim before you cut—and diagnose before you grind
Shims are not evidence of poor workmanship. Manufacturers used them because stamped panels, frames and bodies required adjustment.
A shim at the correct mounting point can change height, angle and flushness in a controlled, reversible way. The important questions are where the shim belongs, what movement it creates and whether the attachment remains secure.
Grinding an edge may appear faster, but it permanently removes material and may hide the underlying cause. Welding an edge to create a show-car gap can be appropriate in a custom restoration, but only after the structure, hinges, mounts and panel positions are correct.
Do not modify a good panel to compensate for a bad foundation.
Reproduction panels are starting points, not guarantees
Reproduction sheet metal and fiberglass make many restorations possible. Without them, cars that deserve to be saved would remain incomplete.
But a new panel is not automatically a correct panel. Tooling, stamping depth, flange position, edge shape, mounting holes and body lines can differ from the original. Two panels carrying the same catalog description may require very different amounts of work.
Test-fit the panel before drilling final holes, welding, bonding or painting. Compare it with the original even if the original is damaged. The worn factory part may still be your best dimensional reference.
If significant reshaping is required, document it. The next person who works on the car should understand why an apparently new panel contains altered flanges, relocated holes or added edge material.
Fiberglass cars demand a different kind of patience
A fiberglass Corvette does not align exactly like a steel-bodied Galaxie, and neither behaves like a Metropolitan assembled from smaller stamped panels.
On a Corvette, body bonding, repaired fiberglass, panel contours, mounting points and the relationship between the body and frame can influence gaps. Sanding an edge can be part of the process, but careless material removal can weaken an edge or create a gap that grows wider after final finishing.
Stress cracks and previous collision repairs may also reveal that the visible misalignment is not simply a hinge adjustment. Study both sides of the panel when access allows. A smooth exterior can conceal a crude laminate repair underneath.
The principle remains the same across materials: identify what is moving, what is fixed and what changed before deciding how to correct it.
Weatherstripping can change a perfect fit
New weatherstripping is often thicker and less compliant than the old compressed seal removed during disassembly. Install it late without testing and a door that previously sat flush may suddenly stand proud or require excessive force to latch.
The same problem can appear at the hood and deck lid. Bumpers, seals, latch depth and hinge tension all affect final position.
Use the correct profile for the application, verify that it is seated properly and allow for initial compression where the manufacturer recommends it. Never solve a weatherstrip problem by pulling a panel dangerously tight against the latch.
Mock up the seals and operating hardware before declaring the gaps finished.
Trim and two-tone paint lines expose misalignment
Body alignment is not limited to openings. Side moldings, emblems and two-tone boundaries can reveal errors across the entire profile.
We encountered this kind of planning on the 1957 Nash Metropolitan. Installing the side trim during mock-up helped confirm the mounting-hole locations, check the way the pieces followed the body and establish the paint break between the yellow and white sections.
That was not merely a trim decision. The molding became a long visual reference line. If one panel sat high, if a hole was misplaced or if the color break wandered, the eye would find it immediately.
Temporarily install long moldings, rocker trim, bumpers, grille pieces and lamps during bodywork. A panel can look correct by itself and look wrong the moment the brightwork connects it to the next panel.
Primer and paint add thickness
A bare-metal gap is not the final gap. Epoxy, high-build primer, sealer, basecoat and clearcoat add material—especially at edges where coatings can accumulate.
If the opening is already too tight in primer, paint will not improve it. Edges that rub during mock-up can chip immediately after assembly.
High-build primer can also soften a crisp body line or disguise a low area temporarily. Guide coat and block sanding help reveal the actual surface. The goal is not to use coatings as structural filler; it is to refine a correctly shaped and aligned body.
The same discipline appears in Engine Paint Correctness, where the right finish begins with understanding the underlying assembly rather than simply adding more paint.
Mock up the entire car before final paint
This may be the most important practical rule in the article.
Before final paint, assemble as much of the exterior as reasonably possible: doors, fenders, hood, deck lid, hinges, latches, bumpers, grille, lamps, major trim, weatherstripping samples and convertible-top interfaces where relevant.
Use the correct fasteners and realistic panel weight. Confirm that the hood clears the wipers and cowl. Verify that doors clear rocker trim. Check that bumper ends agree with fender contours. Open everything repeatedly.
Then disassemble carefully, preserve the shims and marks, and document the proven sequence for reassembly.
Final paint is too expensive to become the first complete test fit.
Useful tools do not have to be complicated
A flexible ruler or dedicated gap gauges for comparing openings.
A long straightedge for checking transitions and broad panel relationships.
Masking tape for protecting edges during repeated fitting.
Assorted factory-style shims organized and labeled by location.
A fine marker, scribe and notebook for recording movements and settings.
Guide coat and sanding blocks appropriate to the panel shape.
A good adjustable light for casting reflections across surfaces.
Reference photographs, assembly manuals and model-specific measurements.
A second set of hands for large, heavy or freshly finished panels.
The most valuable tool may be patience. Moving a panel a sixteenth of an inch in the correct direction is progress. Making three large adjustments at once makes diagnosis harder.
For more on choosing equipment that prevents rework, see The Value of Good Tools: Why the Right Equipment Saves Time, Money, and Frustration.
Common panel-alignment mistakes
Trying to align bolt-on panels before confirming the frame, body mounts and openings.
Using the striker to lift or pull a door into position.
Adjusting around worn hinge pins or damaged mounting points.
Grinding edges before understanding why the gap is wrong.
Fitting panels without their eventual weight, seals, latches or trim.
Assuming every reproduction panel should bolt on without modification.
Chasing modern perfection on a restoration intended to reproduce factory character.
Painting individual panels before completing a full-body mock-up.
Failing to protect and document shims during disassembly.
Correcting gap width while ignoring flushness and body-line continuity.
How to evaluate panel alignment when buying a classic
Panel gaps also belong in a pre-purchase inspection. View the car in natural light and walk around it slowly. Look down the sides from low angles. Open and close every panel. Watch whether the door drops when the latch releases or rises as it engages.
Uneven gaps do not automatically prove serious damage, especially on an unrestored car. They are invitations to investigate. Fresh paint combined with unexplained gap problems deserves particular attention because correction may require disturbing an expensive finish.
Ask for restoration photographs. If the car received major bodywork, the preparation matters more than the final shine.
This is one reason the guide Buying Your First Corvette: How to Buy the Right Car Before You Buy the Wrong One recommends examining fiberglass, frame condition and panel relationships as one system.
Fitzgerald Insight
Panel gaps have taught me something that applies far beyond bodywork: the most visible problem is not always where the solution lives.
A low door may be telling you about a hinge. A changing door gap may be telling you about a body mount. A crooked hood may be telling you that the fenders were positioned around the wrong reference. A wandering trim line may be telling you that several small errors have accumulated across the side of the car.
It is tempting to attack the place our eye notices first. Grind this edge. Move that striker. Add filler here. But restoration rewards the person willing to trace the symptom back through the structure.
The best gap is not the one created by the cleverest last-minute correction. It is the one that appears naturally because everything underneath it is where it belongs.
That is why good alignment feels different. It does not merely look precise. The panels open cleanly. The lines flow. The trim agrees. Nothing appears forced.
You stop seeing the individual repairs and start seeing the automobile again.
A final panel-alignment checklist
Confirm frame, floors, pillars, rockers and body mounts are structurally sound.
Support the vehicle in the same condition used for final alignment.
Repair hinge pins, bushings, latches and mounting points before adjustment.
Document original shim locations and baseline gaps.
Fit doors to fixed body structure before aligning adjoining front panels.
Balance gap width, flushness, body lines and operating clearance.
Test reproduction panels before permanent attachment.
Mock up glass, regulators, seals, latches, trim and other meaningful weight.
Install major moldings and bumpers to verify long visual lines.
Allow adequate clearance for primer and paint buildup.
Complete the full exterior mock-up before final paint.
Label every shim and record the proven reassembly sequence.
Frequently Asked Questions
What is the correct panel gap for a classic car?
There is no universal measurement. It varies by manufacturer, model, year, panel location and restoration objective. Consistency, safe clearance, flushness and factory evidence are more useful than applying one modern measurement to every classic.
Should all classic-car gaps be perfectly equal?
Not necessarily. Factory production tolerances often created some variation. A judged restoration may preserve accepted factory character, while a custom build may deliberately pursue tighter and more uniform gaps. The choice should be intentional.
Can weatherstripping cause a door to sit out?
Yes. New seals can be thicker than compressed originals, installed incorrectly or made from a profile that does not match the application. Test the seal, latch and bumpers together before making permanent panel changes.
Should panels be aligned before or after primer?
Major structural and panel alignment should be established before high-build finishing. Recheck during primer and again during full mock-up because surface work, disassembly and coating thickness can change clearances.
Can bad gaps indicate collision damage?
They can, but they can also result from hinge wear, body-mount deterioration, prior disassembly, reproduction panels or factory variation. Treat the gap as evidence that requires diagnosis, not proof of one specific cause.
Is it acceptable to weld panel edges for tighter gaps?
It can be appropriate in a high-level custom restoration when performed correctly, but only after the structure, mounts, hinges and panel positions are right. Edge modification should refine a sound fit, not conceal a foundational problem.
Take the time before the paint takes the blame
Body panel alignment is slow work because every panel relates to something else. That is precisely why it deserves to happen early.
A careful mock-up gives the painter a stable foundation. It protects expensive edges. It makes trim installation easier. It allows doors, hoods and deck lids to operate without drama. Most importantly, it preserves the visual rhythm the designer intended.
When the finished car finally rolls into the sunlight, people may never know how many times the doors were adjusted or how carefully the fenders were shimmed.
They will simply know the car looks right.
Continue the Fitzgerald Classics journey
Explore Fitzgerald Classics for practical restoration guidance, real-garage lessons and documented project stories from the 1966 Corvette, 1963 Ford Galaxie 500 convertible and 1957 Nash Metropolitan.
Coming Next
Next Friday, the original Fitzgerald Classics 52-week editorial roadmap continues with:
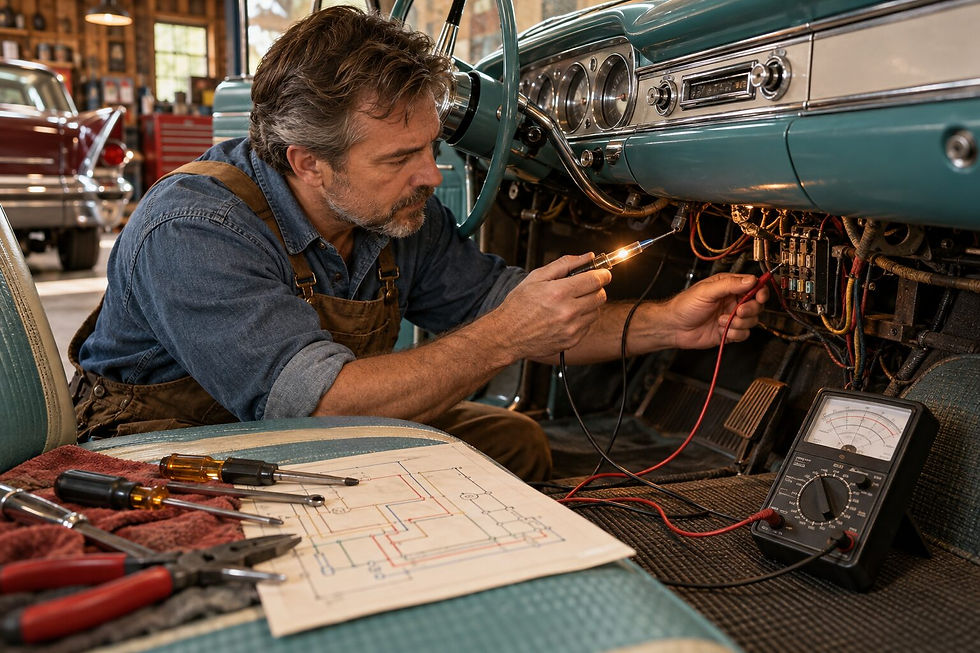
Classic Car Electrical Troubleshooting: Find the Fault Before Replacing Parts
We’ll build a logical diagnostic process for dead circuits, intermittent accessories, voltage drops, weak grounds, blown fuses and previous-owner wiring—so the meter leads the repair instead of the parts catalog.
About the Author
Dan Fitzgerald is the founder of Fitzgerald Classics, a Veteran-Owned automotive publication dedicated to preserving America’s automotive heritage through authentic restoration stories, practical technical guidance and hands-on experience. From documenting a numbers-matching 1966 Corvette to bringing a 1957 Nash Metropolitan back to life, Dan shares the discoveries, mistakes and lessons that happen in a real garage so other enthusiasts can approach their own projects with greater knowledge and confidence.


Comments